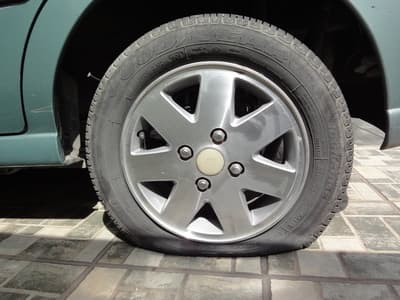
How To Use A Puncture Repair Kit
A tyre puncture repair kit is a useful tool to have in your car in case of a flat tyre. It allows you to quickly and easily fix a puncture and get to your nearest garage for a full tyre repair or replacement. In this blog, we'll walk you through the steps of using a tyre puncture repair kit so that you can be prepared in case of a flat tyre.

Prepare the tyre
The first step in using a tyre puncture repair kit is to prepare the tyre. This means removing the tyre from the car and inspecting it for any damage. If you find a puncture, use a tyre gauge to determine the pressure. If the pressure is too low, you'll need to inflate the tyre to the recommended pressure before proceeding with the repair.
Locate the puncture
Next, locate the puncture in the tyre. You can do this by looking for a small hole or by running your hand over the tyre to feel for any bumps or bulges. Once you've found the puncture, mark it with a piece of chalk or a marker so that you know where to repair it.
If your puncture is too large to be repaired, you will need to purchase a new tyre. To find tyres for your vehicle, click the button below.
Order Tyres
Clean the puncture
Before you can repair the puncture, you'll need to clean it. Use a tyre-cleaning solution or a mixture of water and soap to clean the area around the puncture. This will ensure that the repair will be effective.
Insert the repair string
Once the puncture is clean, it's time to insert the repair string. Each repair kit will come with its own instructions, but generally, you'll need to insert the string through the puncture and pull it through so that it's evenly distributed on both sides of the tyre.
Seal the puncture
The final step is to seal the puncture. Use the glue or sealant that came with your repair kit to seal the puncture. Make sure to cover the entire puncture and the repair string with the sealant. Allow the sealant to dry for the recommended amount of time before inflating the tyre.
We offer a FREE tyre check, which assesses your tyre tread, pressure, and tyre condition. If you'd like to book your vehicle in for a FREE tyre check, click the button below.
Free Tyre Check
Inflate and test the tyre
Once the sealant is dry, inflate the tyre to a maximum of 15 psi. This helps prevent any blowouts on the tyre due to over-inflation. Then check the tyre for any leaks or other issues. If everything looks good, you'll be able to make a short drive to your nearest garage to have the tyre repaired or replaced. You shouldn't drive long distances on a puncture repair kit, due to the risk of a tyre blowout.
At National, we offer a professional puncture repair service at our branches. To book your tyre in for a full puncture repair, click the button below.
Puncture Repair
A tyre puncture repair kit is a great tool to have on hand in case of a flat tyre. By following these steps, you'll be able to quickly and easily fix a puncture and get to your nearest National branch. Remember to always check the pressure of your tyres and keep an eye out for any signs of wear or damage. With a little bit of preparation, you'll be able to confidently handle a flat tyre and get a full repair safely.
Did you enjoy this blog post? |


 Sign up for SPECIAL OFFERS
